

Roundabouts pose a challenge for every new driver in Australia. You will face them in quiet suburbs, busy shopping strips, and on the test routes that determine whether you pass. However, understanding the rules makes them much easier to navigate.
These intersections are designed to improve traffic flow and reduce serious crashes, but they only work safely if drivers know when to give way, how to choose the correct lane, and when to signal. In fact, Australia has built over 3,000 roundabouts specifically to reduce serious road injuries.
Here we explain everything a learner driver in Australia needs to know, from handling single and multi-lane roundabouts to mastering signals and lane discipline. We also cover special situations, such as sharing the road with pedestrians, cyclists, and large vehicles.
#1 Basic Terms and Signs You Need to Know
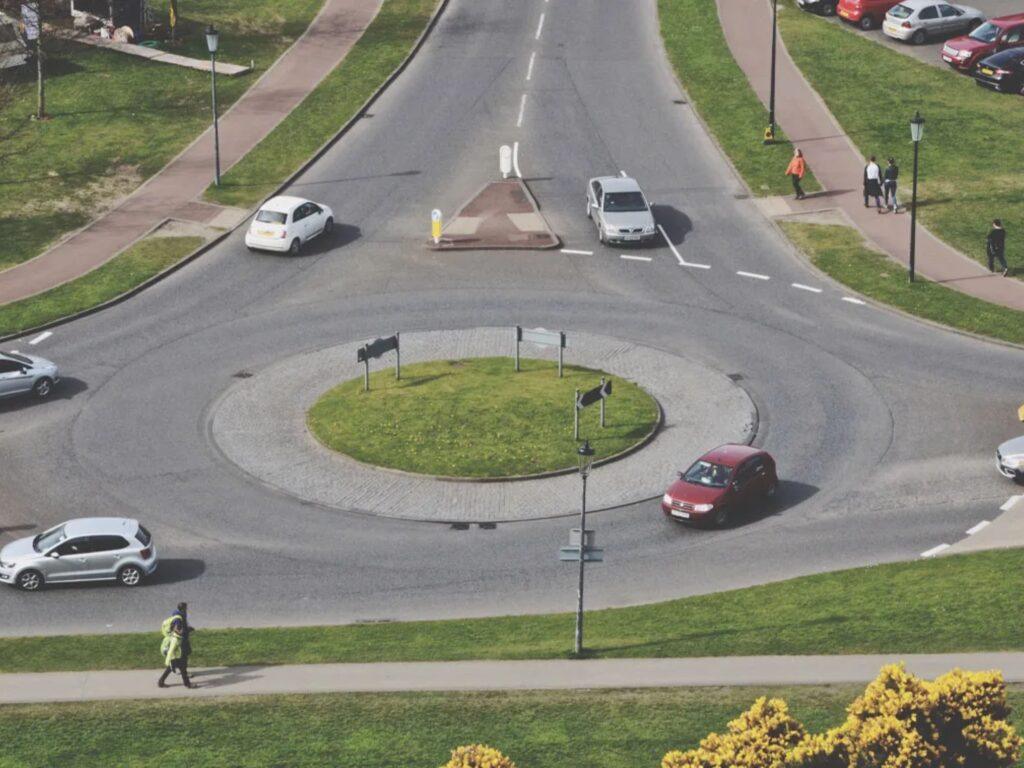
A roundabout is a circular intersection where vehicles travel clockwise around a central island. Drivers enter from different roads and exit at their chosen point. Single-lane roundabouts suit low-traffic areas, while multi-lane ones handle busier spots. Studies show roundabouts cut injury crashes by 25% to 87% in Australia. They also reduce all crashes by 36% to 61%.
Before you approach your first roundabout, let’s get familiar with the language and signs you’ll encounter. Knowing these fundamentals will make the practical steps much clearer.
Give Way to Vehicles Already in the Roundabout Approaching From Your Right
The fundamental rule for any Australian roundabout is simple. It is “give way to vehicles already in the circle”. While many drivers simplify this to “give way to the right,” the law requires you to yield to any vehicle already circulating, regardless of where they entered.
To navigate these intersections safely and pass your driving test, keep these points in mind:
Define “Give Way”: You don’t always need to stop. It means slowing down and ensuring you don’t force another driver to brake, swerve, or slow down.
Safety Benefits: Roundabouts reduce serious injury crashes by roughly 70% compared to traditional intersections by eliminating high-speed, right-angle collisions.
Watch for Large Vehicles: Trucks and buses often need multiple lanes to turn. Give them plenty of space and never attempt to overtake them within the roundabout.
Avoid Hesitation: While safety is a priority, stopping when the roundabout is empty can confuse other drivers and lead to lost marks on a driving test.
The Entry Checklist:
- Slow down on the approach.
- Check your right, but scan the entire intersection.
- Identify a safe gap.
- Enter smoothly without making others adjust their speed.
How to Use Indicators at Roundabouts
Correct indicators are essential for communicating your path to other drivers. In Australia, clear signalling reduces side-impact crashes and is a major focus for driving examiners. While state rules vary slightly, the core principles remain the same across the country.
Follow these specific steps for each maneuver:
Turning Left: Signal left as you approach. Keep it on until you have fully exited.
Going Straight: Do not signal on entry. Once you pass the exit before yours, signal left to show you are leaving the roundabout.
Turning Right or U-Turns: Signal right on entry. Maintain the right signal as you circulate, then switch to a left signal after passing the exit immediately before yours.
Avoid these common learner mistakes:
- The “Exit Signal” Miss: Many learners forget to signal left when exiting while going straight. This is a frequent cause for losing marks.
- Signal Timing: Signalling too late gives other drivers no time to react. Aim to be predictable, not sudden.
- Mirror Checks: Always check your mirrors before changing your signal direction to ensure no vehicles have entered your blind spot.
Essential Road Signs & Markings
Visual cues on the approach tell you exactly how to behave. Recognising these early gives you more time to plan your entry and avoid last-minute swerving. Scanning for these cues early ensures you aren’t caught off guard by lane changes or unexpected traffic.
These markings are regulatory instructions, not suggestions:
Roundabout Ahead Sign: This yellow or red-bordered warning sign is your cue to begin slowing down and assessing the traffic flow ahead.
Lane Arrows: These white painted arrows dictate your path. You must be in the correct lane for your intended exit before you reach the entry line.
Give Way Line and Sign: The broken white line is your final decision point. You must stop here if there is any circulating traffic, only moving off when there is a safe gap.
#2 Steps to Navigate Roundabouts
Mastering roundabouts involves three distinct phases: the approach, the entry, and the exit. Following these steps consistently ensures you maintain control and communicate clearly with other road users.
Phase 1: The Approach (Preparation)
Your preparation determines how smoothly you handle the intersection.
Slow Down and Position: Reduce speed as you see the “Roundabout Ahead” sign.
Lane Selection: Choose your lane based on your exit. Use the left lane for left turns and the right lane for right turns or U-turns. For going straight, either lane is typically acceptable unless markings state otherwise.
Initial Signal: Signal left if taking the first exit, signal right for a right turn, and do not signal if going straight.
Phase 2: The Entry (The Decision)
This is the most critical safety moment where the “give way” rule is absolute.
Give Way to the Right: You must yield to all vehicles already circulating. This includes vehicles crossing your path from the left if they entered before you.
Find Your Gap: Only enter when there is a sufficient space. Never “blindly follow” the car in front; you must judge the gap for yourself.
Pedestrian Awareness: Give way to pedestrians using marked crossings at the entry or exit.
Phase 3: The Exit (Communication)
Exiting correctly prevents confusion and keeps traffic moving behind you.
The Exit Signal: This is the most forgotten step. Signal left after you pass the exit immediately before yours.
Blind Spot Check: Before steering toward the exit, check your left blind spot for cyclists or vehicles.
Smooth Departure: Exit into the correct lane and cancel your indicator once you have cleared the roundabout.
If remembering “1st, 2nd, 3rd exit” is confusing, use the clock face method. Imagine you enter at 6 o’clock. Any exit before or at 12 o’clock (straight ahead) is a left or straight move. Any exit past 12 o’clock is a right-hand move. Use this to quickly decide your lane and signal.
#3 Choosing the Correct Lane Before Entering
Early lane selection is vital for safety and passing your driving test. Making your decision well before the entry point prevents last-minute swerving, which is a high-risk move that confuses other road users. Losing points for poor lane discipline is avoidable with early planning. If you aren’t sure, scan the road surface for arrows as soon as you see the roundabout warning sign.
Follow these principles for disciplined lane use:
- Signs Overrule General Rules: Always prioritise directional signs and painted road arrows. If a marking says “Left Only,” you must follow it, even if the general rule differs.
- Multi-Lane Strategy: Unless signs specify otherwise, use the left lane for turning left or going straight. Use the right lane for turning right or making U-turns.
- No Mid-Roundabout Changes: Avoid changing lanes once you are inside the circle. This is a common cause of side-swipe collisions. If you enter the wrong lane, stay in it, exit where it takes you, and reroute safely.
- Positioning and Planning:
- Left Turn: Stay in the left lane, positioned toward the left.
- Straight: Use the left lane (unless both lanes are marked for straight).
- Right Turn: Use the right lane, positioned toward the right.
#4 Navigating Different Types of Roundabouts
Single‑Lane Roundabouts
- Approach from the left side and stay steady
You pick the outer lane, slow to 20 km/h, and give way to traffic from your right. Once clear, you enter smoothly and reach the island’s edge while keeping a constant speed. - Exit with a left signal three seconds early
Signal left just after passing the exit before yours, so following drivers know your move. Single-lane designs cause 60 per cent fewer crashes than signal lights because everyone slows naturally.
Multi‑Lane Roundabouts
- The left lane takes you straight or left; the right lane handles right turns
Check signs 30 metres out and position early: outer for first or second exit, inner for third exit or U-turn. You stay in your lane the whole circle, no drifting allowed. - Merge carefully and watch adjacent lanes
Bigger roundabouts near highways see 2-3 times more traffic, so you scan right, then left, before entering. Trucks take wider paths, so give them room and avoid squeezing beside them.
Mini‑Roundabouts and Complex Designs
- Treat mini ones like full size, but react faster
These tight circles in subdivisions demand sharp scans for peds and bikes. You yield right, straddle the island if unmarked, and exit signalled, just like bigger ones. - Complex setups mix lanes and signals
Shop centres feature painted lanes and yield signs; follow markings exactly. Core give-way rules cut confusion here, where poor lane choice sparks 30 per cent of disputes.
#5. Special Situations For Learner Drivers
While basic rules cover most intersections, complex scenarios require higher levels of observation and defensive driving.
- Consecutive Roundabouts: Treat each circle as a completely separate event. Finish your signals for the first roundabout before immediately resetting and preparing for the next one.
- Size Matters: In the case of large roundabouts, focus on matching traffic speed and precise exit signal timing. For Small Roundabouts, approach at a very low speed. Signals happen quickly, so be decisive with your indicator.
- Vulnerable Road Users: Bicycles and motorcycles have the same rights as cars. Never try to squeeze past a cyclist in a lane; treat them as a full vehicle and give them plenty of space.
- Heavy Traffic and Indicators: In gridlock, do not enter a roundabout unless your exit is clear; blocking the flow is often a legal offence. Additionally, never trust another driver’s indicator alone; wait for their vehicle to physically commit to a turn before you move.
- Pedestrian Crossings: Often located at the entry or exit points. You must give way to anyone on a marked crossing. Scan both sides of the road as you exit, particularly in school zones or shopping precincts.
- Cyclists: Expect cyclists to use the left lane or the edge of the road. Never attempt to overtake them within the roundabout, and always check your left blind spot before exiting.
- Emergency Vehicles: If you hear sirens, do not stop inside the roundabout, as this blocks the intersection. Exit safely, then pull over to the left once you have clear space.
- Blocked Exits: If traffic is backed up and you cannot clearly exit, do not enter the roundabout. Blocking the flow is a common reason for failing a driving test.
- Wet Weather: Rain significantly reduces tyre grip on the curved surface of a roundabout. Lower your speed further than usual and avoid harsh braking to prevent skidding.
- Lane Discipline at Exits: If an exit has two lanes, stay in your lane as you leave. Only merge once you have cleared the intersection and performed a safe mirror and shoulder check.
#6 Common Roundabout Mistakes and How to Avoid Them
If you know the most frequent errors, it will work as the best defence. These mistakes increase crash risk and are the leading reasons for failing a driving test in Australia.
1. Incorrect or Missing Exit Signals
Many learners remember to signal when turning, but forget the left “exit blinker.”
The Risk: Without a left signal, waiting drivers don’t know they can safely enter, which causes gridlock and frustration. In some states, one in five drivers fails this simple communication.
How to Avoid: Make it a physical habit. The moment your car passes the exit immediately before yours, your hand should move to signal left.
2. Changing Lanes Mid-Roundabout
Realising you are in the wrong lane and swerving across dotted lines is a major violation.
The Risk: This causes side-swipe collisions, especially at complex multi-lane sites where annual crashes can average over 4 per site.
How to Avoid: If you make a mistake, accept it. Take the exit your current lane dictates and reroute safely later. A five-minute detour is cheaper and safer than a crash.
4. Over-Hesitation vs. Entering Too Fast
The Problem: Stopping at a completely empty roundabout (hesitation) or entering at high speed (lack of control).
The Risk: Unnecessary stopping can cause rear-end collisions, while speeding reduces your reaction time and increases the risk of losing control in wet weather.
How to Avoid: Aim for a steady 20–25 km/h once inside. Practice a “rolling approach” if it’s clear; keep moving smoothly.
5. Following the Car in Front Blindly
The Problem: Entering because the car ahead of you went, without performing your own check.
The Risk: The gap the first car used may have closed. You are legally responsible for your own vehicle’s right-of-way decisions.
How to Avoid: Treat your vehicle as an “island.” Perform your own 360-degree check every single time, regardless of what the vehicle ahead does.
6. Ignoring Vulnerable Road Users
The Problem: Not scanning for cyclists in your blind spot or pedestrians at the exit crossings.
The Risk: These oversights account for 20% of incidents in busy urban areas.
How to Avoid: Always check your left mirror and shoulder before exiting to ensure a cyclist hasn’t moved into your path.
#7 Roundabouts in the Driving Test
Typically, assessors test you on at least three roundabouts during your drive. You will likely face a mix of single-lane and multi-lane intersections, often in heavy traffic, to test your nerve and decision-making.
Any major fault, such as forcing entry or a collision, results in an Immediate Termination Error (ITE).
Critical Errors Result in Instant Fail
Certain mistakes show a lack of safe control and will end the test immediately:
- Failing to Give Way: Forcing another driver already in the roundabout to brake, swerve, or slow down.
- Incorrect Gap Selection: Entering when it is clearly unsafe or hesitating so long that it creates a hazard for drivers behind you.
- Mounting the Kerb: Striking the kerb hard enough to cause discomfort or mounting the central island.
- Disobeying Signs/Markings: Driving over part of the roundabout intended only for heavy vehicles or ignoring a “Stop” sign.
Minor but Costly Mistakes
While one minor error might not fail you, accumulating several will. Examiners look for:
- Poor Observation: Failing to perform a head check/blind spot check before exiting or changing direction.
- Signalling Faults: Forgetting to signal left when exiting or cancelling your signal too early.
- Lane Discipline: Drifting between lanes or cutting across a lane within the circle.
- Inconsistent Speed: Approaching too fast or driving unnecessarily slowly (e.g., under 20 km/h) when the way is clear.
What Examiners Look For
Assessors value predictability and anticipation. They want to see you:
- Plan Early: Identify your exit and choose your lane at least 30 metres before the entry.
- Scan Deliberately: Move your head clearly to check the right, the centre, and the path ahead.
- Communicate: Use your indicators exactly when required to let others know your intent.
- Drive Smoothly: Adjust your speed early, so your entry and exit are fluid rather than jerky.
Your Pre-Roundabout Checklist
Run this mental scan every time you approach a circle:
- Mirrors: Is the traffic behind me aware I’m slowing down?
- Lane: Am I in the correct lane for my exit?
- Signal: Have I indicated my entry direction?
- Scan: Is the roundabout clear of circulating traffic?
- Exit: Am I ready to signal left once I pass the exit before mine?
#8 State‑by‑State Notes Learners Should Know
While Australian states follow the same core Road Rules, small differences in interpretation and testing standards exist. Understanding these nuances is key to passing your test and driving legally across different borders.
The “Straight Ahead” Signal Rule
In every state, you do not signal upon entering if you are going straight. However, the requirement to signal left as you exit varies slightly in wording:
- QLD, WA, and NT: You must signal left when exiting, even when going straight. This is a mandatory requirement that examiners strictly assess.
- NSW, VIC, SA, and TAS: You must signal left when exiting “if practicable.” While this gives some leeway for tiny roundabouts where signalling is physically difficult, examiners still expect to see an exit signal during your driving test to show clear communication.
- ACT: Follows a unique “halfway around” rule. Any exit before the halfway point (12 o’clock) is treated as a left turn (signal left on approach), and any exit after is a right turn (signal right on approach).
Key Regional Differences
| State | Key Difference | Learner Tip |
| Victoria | Trams have priority. | You must give way to any tram entering or approaching a roundabout. This is a common “instant fail” on Melbourne drive tests. |
| NSW | Heavy on timing. | Service NSW (RMS) tests focus heavily on the timing of your right-to-left signal switch. Switching too late can lead to lost marks. |
| Queensland | Higher fines. | QLD strictly enforces exit signalling. Failing to give way or signal correctly can result in higher fines than in some other states. |
Penalties and Demerit Points
Breaking a roundabout rule is expensive and risky for your licence. As a learner or P-plater, your demerit point threshold is low (usually between 4 and 7 points).
- NSW: Failing to give way at a roundabout can cost over $400 and 3 demerit points.
- WA: The same offence typically results in a $150+ fine and 3 demerit points.
- VIC: Failing to give way can lead to a fine of over $190 and 3 demerit points.
Note: Always download your specific state’s current Road User Handbook. These guides are updated regularly and contain the exact diagrams your examiner will use to score your test.